Wednesday, May 4, 2011

Simple Soup

Even though it's technically May, where I live there hasn't been alot of Spring weather. Typically, people not living in Washington would be dusting off the barbecue...refilling the propane or brickets. Us, nope. We still have the furnace on. Today just so happened to be 60 or so degrees and even though it seemed like a heatwave to me - this soup recipe just beckoned!

I first saw it on Alexis Stewart's' blog. She is always cooking something delicious! The soup is called:Chickpea Vegetable Soup With Parmesan and Rosemary and it is very very good. I had just about everything on hand! The only thing I didn't have was the Parmesan rind. Fine by me. I made soup with one once and there was something "off" about the taste. Maybe it had something to do with the quality of the cheese? Well, since there isn't a Dean and Deluca around...what's a girl to do? So no rind. Oh, and I couldn't find dried chickpeas, but I had some canned ones which worked out just as good (I imagine) and it cut the cooking time down!

It's really very simple with no meat and little seasoning. I'm just linking to the site because, well...it's easier.
Chickpea Vegetable Soup With Parmesan and Rosemary

Saturday, April 16, 2011

Cooking, instead of studying.....

Who says that procrastination can't be constructive? This weekend was pretty quiet so what's a girl to do? Homework in either Algebra or English? - no. Cleaning? - no. Cooking? - Yes!!! Side note - I did do the homework anyway, I just didn't want to.

It had been ages since I made chicken parmesan so, raise your glasses to the winner winner chicken dinner (get it?), Chicken Parmesan and it's side kick, pasta pomodoro! We begin with the chicken parm. I did something that I don't usually do...I winged it. Or rather, combined and winged a couple of recipes together to create what I wanted my chicken parm to taste like. I already knew that the nut crusted chicken was super juicy and moist...okaaaaaay. Change the spices around a bit and bam! You have a flavorful crispy baked chicken breast that can be easily turned into chicken parm (simply add sauce and cheese).

For the chicken, I took regular chicken breasts and dredged them in seasoned flour (you must season your flour), then egg (plain old egg), and then a combination of shallot, garlic, parsley and panko which had been slightly toasted in a fry pan. I think the trick is to toast the bread crumb mixture. It adds a nuttiness that you don't get otherwise. The panko is crunchy already, but it is essentially flavorless. Then bake at 350 for about 40 minutes or until an instant read thermometer reads 160 farenheight NOT celcius(refer to the salmon blog for the joke which is on me). Top with sauce and mozzerella cheese, broil and done!

Chicken Parmesan (I am making this up as I go along..)

4 Boneless chicken breasts 4 cloves garlic minced
1/4 onion minced (I put mine in a food processor with the garlic so Chris can't bite down into a piece of onion or he freaks out)
3 tbl fresh italian parsley minced(I never use the curly kind, yuck)
1/4 cup grated (not shredded) parmesan cheese
1-1/2 cups panko
3 tbl olive oil red sauce
mozzerella cheese
1 tbl italian seasoning
1/2 cup flour
2 eggs beaten
Ok, let me think.... Preheat oven to 350 Take chicken breasts, trim them of extra fat and yuckiness, sprinkle with kosher salt and stick in the refrigerator. I don't know why..the recipe I adapted just said to do it and it has always tasted good so I don't ask questions. Mince the garlic and onion and saute in the olive oil for about 5 minutes or so. You don't want it to get brown, just soft. Add the panko and cook on medium low heat stirring between constantly and occasionally until lightly golden brown. Once golden brown, remove from heat and let cool on paper towel for a bit. Add chopped parsley and parmesan cheese. Prepare three shallow dishes (I use pie plates). One with the eggs beaten, one with the flour and italian seasoning, and one with the panko mixture. Take your chicken breasts and first dredge them in the flour, then egg, then panko. Put on a wire baking rack set on a sheet pan. Bake at 350 for about 40 minutes until an instant read thermometer says 160. Remove from oven. Top each chicken breast with whatever sauce you have, mozzerella cheese and broil in the oven until the cheese is melted and starting to become golden. YUM!

Pasta pomodoro..and also the sauce I put on the chicken.
Again, let me think.
Ingredients:
28 oz can of tomatoes
1 medium onion minced
4 cloves garlic minced
pinch of red pepper flakes
pinch of sugar 5 basil leaves
1/4 olive oil 2 tbl butter
1/4 cup grated parmesan cheese
1 lb buccotini(like spaghetti only like a tube) or spaghetti

Puree the tomatoes, set aside. Saute the onion and garlic in the olive oil until soft. add the red pepper flakes and pureed tomatoes. simmer until slightly thickened, about 5-8 minutes (totally guessing). Take off heat and add the basil leaves and sugar. Boil the pasta in salted water until almost soft. Reserve about 1 cup of the pasta water. Remove the basil from the sauce, add the almost done pasta and a bit of the pasta water to loosen the sauce. Finish cooking the pasta in the sauce adding pasta water as needed to thin the sauce. When it's done (5 minutes later) take off the heat and add the parmesan cheese and butter. Stir until butter is melted. Serve. Oh, before I added the pasta to the sauce, I ladled some sauce on the chicken...

Chris stopped by Borrichinis today for supplies including fresh bread. What does fresh bread need? Roasted garlic butter, that's what!

Take 1 head of garlic (or more, whatever) and slice the top 1/3 off it. Drizzle with olive oil, wrap loosely in foil and bake at 350 for about 45 minutes to 1 hour or until the garlic looks opaque and is starting (key, starting) to brown. I learned the hard way that if it gets browner than just "starting" then it's burned and bitter. Yuck. Ok, take your roasted, sweet - not bitey garlic cloves and mash them with softened unsalted butter and BAM! Roasted garlic butter to spread on your bread. Just like Lombardis only you can wear yoga pants to dinner!
The garlic and butter prior to the mashing...

Yummy dinner!

Foot note - My formatting has mashed itself together seriously 3 times while writing this!!! If you see places where it looks like there should be a space or new paragraph...you are probably right! I am seriously sick and tired of taking the time to make paragraphs only to have it become one large paragraph grrr..

Wednesday, April 13, 2011

Fish poaching - the results!

First off, there won't be any pictures for this one. Dig deep, way back to grade school and use your imagination to visualize the words that are coming out of my mouth. It's good for you.

So I poached the fish in the court boullion and it was really yummy! Truthfully, there aren't any pictures because there wasn't much to see. Poached fish on a plate. I didn't eat it for a meal I just tasted it and into the fridge it went! White fish on a white plate? I'm not so good with a camera but even I know that wouldn't have made a good picture.

The fish was tender, but not mushy. It has a subtle taste from the broth and it all is just very lovely. Now, the original reason for me cajoling this recipe out of Devin was for lobster tail. Since I was plumb outta those...fish was chosen. I will, however, be trying that next.

Thank you Devin!

Sunday, April 10, 2011

Why it's awesome to have a friend who is a chef!

I was in cooking heaven last night! Our friends' Devin and Cassondra were up visiting Devin's mom with their two kids and we went over for dinner. The evening was simply delightful. The best part for me was two fold... 1. getting to know Cassondra better and 2. Getting to watch Devin cook dinner while peppering (pun intended) him with cooking questions the WHOLE time. He was very gracious and answered them all PLUS gave me a couple of recipes. Win Win Win!!

Another big THANK YOU! to Devin for answering so many questions and humoring me while I frantically scribbled notes so I wouldn't forget.....

I had asked him about the best way to cook (and not ruin) lobster tail. His suggestion was to poach it in court boullion. My French is rusty, and I asked him to translate it. Basically, it's a poaching liquid with:
1 part white wine
1 part white vinegar
1 part veg stock (homemade, of course)
1 shallot
A few peppercorns
A pinch of red pepper flakes
1 whole orange. Juiced and tossed in
1 whole lemon. Juiced and tossed in

Simmer that for 20 minutes and strain all the solids out. Then poach your lobster, fish, or whatever seafood you want in it. I am currently defrosting tilapia to poach in it even though I already have eaten dinner. I just am dying to see how it will taste.

Side note: I had a very zen start to the day....went to Bellevue Square to get some makeup I ran out of..stopped by Lucy to see what there was to see and then I hit Whole Foods on the way to 405 to get the ingredients for the stock and the boullion. Oahmmmmm.

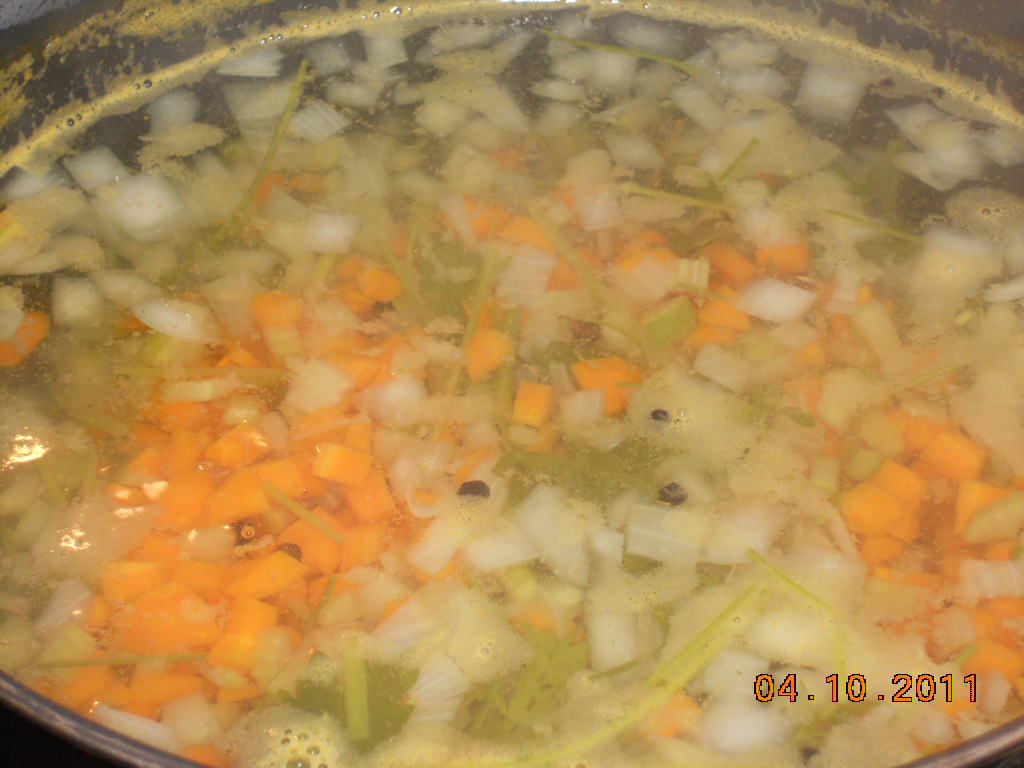
The veg stock is as follows:
1 yellow onion chopped
About 5 or so carrots chopped
3-4 stalks of celery chopped The stems (no leaves) of flat leaf parsley chopped
10 or so peppercorns
1 bay leaf
8 cups of water

Peel the onion and carrots. Remove the root ends and any leaves (bitter) Chop everything so the pieces are small and you have what amounts to equal parts of the veg. Simmer, not boil ("no bubbles" as I was instructed) for about an hour then strain the solids and use for the bouillon or soup or whatever.

It made the house smell wonderful. Notice that there wasn't any salt? That was on purpose. Season the dish you are using the stock for...not the stock.

When I finished the court boullion (aka. poaching liquid) it has a vinegar/sweet smell. I am really interested to see how the fish turns out that I won't be eating until tomorrow...but I just couldn't wait. Veg stock simmering and those black specs are peppercorns.. The rest of the ingredients for the boullion. Boullion simmering Stay tuned for the poached fish in court boullion. Unless it's crap, then you will see nothing. :)

Sunday, March 27, 2011

Not Yentl, but lentils.

It was the first word I could come up with that rhymed. Whatever.

I got this recipe from a gal who used to cut my hair. It's a healthy side dish or leftover snack. It's really easy and who doesn't need to eat more lentils? Besides lentil soup, I don't have a vast arsenal of lentil recipes...this is a good stand by.


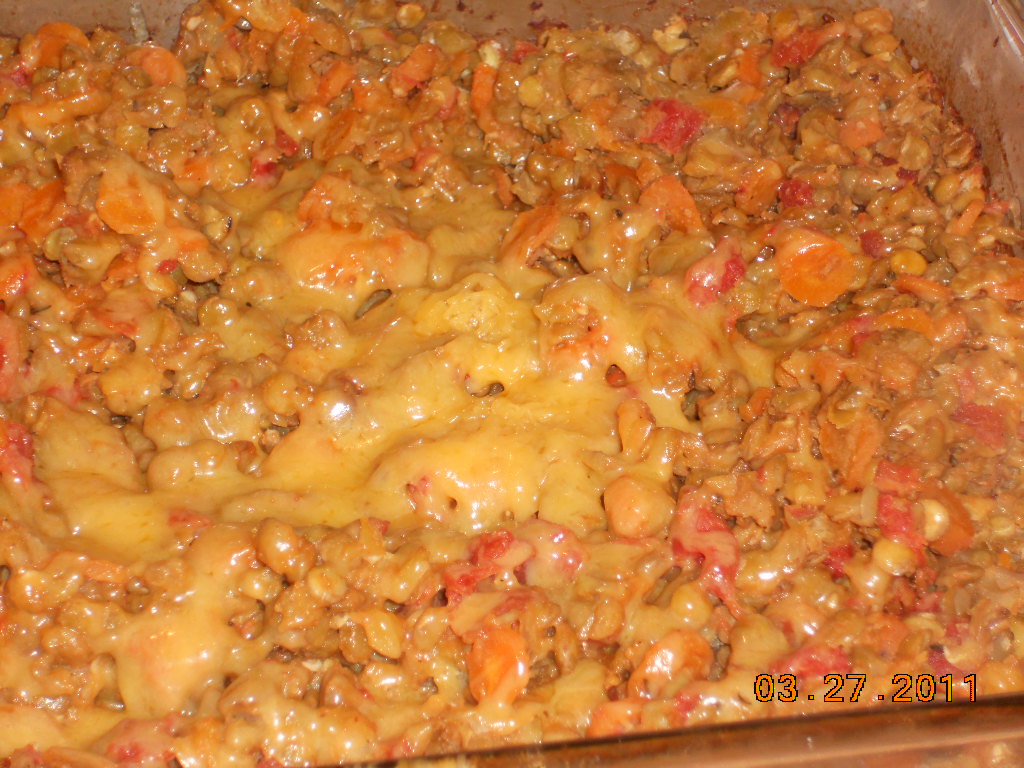
Don't judge the picture too harshly. I didn't make this for dinner, I made it for lunches next week so the picture isn't so fabulous. The cheese blobbed in the middle and believe it or not, this was the best angle to take the picture. Don't go by the picture..just make it, it's yummy.

Lentil Casserole (from Bobbi - thank you!)

2 cup lentils (1 package) rinsed.
2 1/4 cup water - I use chicken stock
2 teaspoon salt - I don't add the salt
1/4 teaspoon pepper
1/8 teaspoon marjoram
1/8 teaspoon thyme
1 bay leaf
1 1/2 cups onion, chopped finely
2 cloves garlic, minced
15 oz. canned diced tomatoes
2 cups thinly sliced carrots
1 cup thinly sliced celery - I don't add this, Chris would have a hissy fit.
1/2 cup diced green pepper (I always leave this out)
2 1/2 cups grated sharp cheddar cheese

In 9 X 13 inch pan, combine lentils, water, salt, pepper, marjoram, thyme, bay leaf, onion, garlic, and tomatoes. Cover with foil and bake at 375 degrees for 30 minutes. Stir in carrots, celery, and green pepper. Cover and continue baking for about 40 minutes longer or until vegetables are tender. Sprinkle cheese over top and return to oven uncovered just until cheese is melted. Serves 8.

Realistic note - Depending on how hot your oven bakes things....you may need to either lower the heat to 350 or add more liquid. I, should have lowered the heat because the edges all dried out and stuck to the pan. This is why the picture is the way it is....I wanted to hide all the dried up parts. It's still yummy though.

Monday, March 21, 2011

Same, same, same.

Oh, hi there. My name is Jannell, nice to meet you! You may not remember who I am but I am the one who writes this blog albiet sporatically at best. I just haven't cooked anything whoop-ed-dee-doo lately. Today, I thought I would get back into the groove of things with a weekly dinner staple at our house. It's a throwback to your school cafeteria days. Excited? On the edge of your seat? Waiting with bated breath?

Well, don't be. It's rather ho hum. It is nostalgic though....

Chris' mom calls it "slop" ...we call it "turkey gravy" (and it sounds a little better our way). Oh, and I just finished quarter one out of years and years worth of college quarters. If my English teacher saw this, she would make this blog absolutely bleeeeeeeed red with all the gramatical errors. But hey, it's my blog...and I can just write how I want to here. I'm not worried about comma splices and misuse of verb tense at the moment. Maybe I should be..

It's a safe space.

I should really do a series on the dishes that my family wants me to make on a weekly basis. No, really..there are like, 5 or so dinners that they expect to have each week and after a while I start losing my mind a bit. It's to the point where we will sit down to eat (insert dish here) and someone will start with "..did you do something different to the (insert same dish here)?" Oh, for the love....

So for lack of anything else to blog about, other than maybe a different OCD way I assemble my lasagna (I don't rinse the noodles anymore)...I bring you - Turkey Gravy over Rice (or you could do mashed potatoes, or noodles). Oh, the versitility. Pfft. (Extreme sarcasm....)

Ingredients:

1 package ground turkey. You could also use ground beef, but we don't.
2 cans Campbells Cream of Mushroom Soup
1 can of milk
Salt and pepper to taste or Chris' seasoning to taste. I use Chris' seasoning.
Prepared rice, mashed potatoes, or noodles. @Sasch, I don't know how much of this ingredient...enough for your family should be the measurement. :)

Brown your meat in a large skillet. I use a chicken fryer. It's like a fry pan but it has higher sides. I seriously make everything in that pan. Come to think of it, I need a new one. Ok, once your meat is browned, add the soup and milk and simmer until the desired consistancy is reached for your liking. This recipe is also a good one to double and use for lunches or leftovers. It reheats very well and is quite comforting when it rains.

Serve over your favorite starch. We also serve frozen peas on the side. And, in case you are wondering...it's always served with peas. If I run out of peas, it causes an incident. It's really quite rediculous.

Below is my portion for tonight. No peas, salad instead however, you can be sure that there were peas. Oh yes, there were peas.

Wednesday, February 16, 2011

Chicken Party


Whether you are in the mood for a chicken pattie or a chicken party...this baked chicken recipe is moist and juicy goodness. Who would have thunk it?

(The term "chicken party" is an inside joke. Don't take too long trying to figure out what it means.) - Thank you

What comes to mind when you think of boneless, skinless chicken breasts? Dry, way too dry, oh...and dry some more. I swear the only time they weren't dry for me was when I either - cooked them in sauce OR on my George Foreman for 8 minutes (not one minute longer).

I stumbled on this recipe from Cooks Illustrated and thought it would be worth a try. Wow. Moist on the inside and crunchy on the outside. What's not to like?

Again...an adaptation.

Ingredients
4 boneless skinless chicken breasts
1 cup roughly chopped nuts (I happened to have cashews)
4 TB unsalted butter cut into 4 pieces
1/4 of an onion, minced. About 3 TB.
1 cup panko
2 tsp finely grated zest from 1 lemon, zested lemon cut into 4 wedges.
1 tsp minced fresh thyme leaves (don't use dry, there is something special about fresh herbs)
1/8 tsp cayenne pepper
3 large eggs
2 tsp dijon mustard
1/4 tsp pepper
1/2 tsp kosher salt
1 cup flour

Oven to 350 degrees.
Using a fork, poke thickest half of each breast 5 to 6 times. Place on wire rack set in rimmed baking sheet and evenly sprinkle each breast with 1/2 kosher salt. Refrigerate, uncovered, while preparing coating.

Process nuts in food processor until they resemble coarse meal. Heat butter in skillet over midium heat. Cook, swirling pan constantly until butter turns golden brown and has nutty aroma 4 to 5 minutes. Don't burn the butter. Reduce heat to med low. Add panko and ground nuts. Cook stirring frequently until golden brown. Transfer panko mixture to shallow dish and stir in lemon zest, thyme and cayenne.

Lightly beat eggs, mustard and pepper together in second shallow dish. Place flour in third shallow dish. Pat chicken dry with paper towels. Dredge chicken breast in flour, shaking off excess, then coat with egg misture, allowing excess to drip off. Coat all sides of chicken with panko mixture, pressing gently so that crumbs adhere. Transfer breaded chicken to clean wire rack set in rimmed baking sheet and repeat with other chicken.

Bake 20-25 minutes or until an instant read thermometer reads 160 when inserted into the thickest part of the breast. Let rest 5 minutes.

Tuesday, February 15, 2011

What a difference a year makes!

Who remembers the "hot mess" birthday cake of 2010? I do. Why in the world would I want to make that cake again? I am glad you asked that question....because I bought the correct cake pans! Ta daaaaa!

Always, always have the right tool for the job. I needed 9 inch cake pans, I bought 9 inch cake pans.

Although, I still refer to this recipe as the "hot mess" carrot cake....it's no longer a hot mess, really.

Sunday, January 9, 2011

Just "meh" Mahi Mahi with tomatoes and olives

So I have alllllll this Mahi Mahi. I tried a couple of things with it, and they were ok. Maybe what I needed was an actual "recipe" for mahi mahi? I have just been adapting my favorite tilapia recipes thus far. My final verdict is no. No, you don't need a special mahi mahi recipe to make a good fish dish with this stuff. Just don't cook with it. Ok, back it up...yes, it tastes fine. Yes, to all the whatever questions. I just don't think I care for the texture. Don't misunderstand..the recipe is good, and I would and will make it again but once I run out of the mahi...it's gone for good. It just can't compete with my tilapia loins from Costco. Geez, my intro must really make you want to read further and make this right? Hahaha. Just keeping it real. But seriously, it is a good recipe. I made a big batch and ate it all week for dinner.

Mahi-Mahi in tomato-olive sauce (as adapted from Bon Appetit)

Ingredients:
2 tbl olive oil
1 cup chopped onion
1 cup dry white wine
1 tsp anchovy paste (seriously...not even sure what this ads to the recipe)
2-14oz cans diced tomatoes
4 6oz mahi mahi fillets
1/2 cup large green olives. Pitted and quartered
3 tsp chopped fresh oregano
1 tsp (packed) finely grated orange zest

K. So you saute the onion in the oil until it starts to turn translucent. Add wine and anchovy paste. Again, not sure what the anchovy paste does. I happened to have it (go figure) so I added it. Reduce it until the liquid is about 3/4 cup. Add tomatoes, juice and all and bring to a boil.

Lightly salt and pepper the fish. Place the fish on TOP of the tomato mixture. Reduce heat to low, cover and gently simmer until fish is cooked. 7-9 minutes. How do you know when the fish is done? I just took a piece out and cut it in half. Mine wasn't ...so back in the pot it went. Oh, by the way..this fish is reeeeeealy easy to overcook as I have done so each time I have tried to cook it. Whatever, I am just dealing with it until it's all gone.

Fish on top of simmering sauce..

When the fish is done take it out and put on a plate tented with foil to keep it warm. Mine got cold, but the sauce kind of heats it back up a smudge. Add the olives, oregano and orange peel to the sauce and reduce on high until it is thickened. Season to taste with salt and or pepper. Serve over fish.

Seriously, if anyone makes this and doesn't agree with me about the texture of the fish please let me know what the error of my ways is. I am over it at this point. The picture didn't turn out so good because I just noticed that you can't even see the fish. Trust me, there is fish under there.

Sorry mahi mahi, I am just not that in to you.

Friday, December 31, 2010

Happy New Year! Pass the take-out...

See, what did I say? The very next blog...take out! Tonight's blog is sponsored by Papa Murphy's' and Cristiano's Pizza.


Papa Murphy's. What can I say? If you haven't had the pleasure it is just about the most inexpensive and healthy way to get pizza. Sounds a bit like an oxy moron, but no. I love how you call in, pick up, go home and bake. The crust is chewy and good and the sauce has this spice to it that makes it enjoyable.

My son has a friend over and they are getting ready to see a movie. I, on the other hand, have been driving all over creation this afternoon doing the grocery shopping because Costco is closed tomorrow and I have a concert to go to on Sunday. Friday Costco trip it is! Forget that it's New Year's Eve and everywhere is a Z-O-O... The original plan for tonight was to get pizza for the boys and I was going to try this new Mahi Mahi recipe. Well, that didn't work out so I decided to blog about what I am actually eating for dinner :) See, I don't usually do that. I plan on cooking, something happens like life...or something and I end up eating left overs or take out and NOT blogging about it. Enough of that. I am pulling the curtain back and now you get the real scoop.

Usually, our order at Papa Murphy's is a family (the largest you can get) pepperoni and a family Canadian bacon, mushroom and black olive. Obviously..pepperoni for the kids, the other for Chris and I eat fish or something. Tonight I am dining on 1 slice of the latter pizza and leftover Cranberry Mimosa Salad from Cristiano's'. The salad consists of mixed greens, tomato wedges, a bread stick (not pictured), mimosa dressing, pistachios, crasins and Gorgonzola cheese. Mmmmm.


Our friends Paul and Vickie own Cristiano's' and Paul is the chef. What's good?, you may be asking ...well, frankly everything! He makes the pizza crust and bread stick dough fresh every day. Soup of the day is made from scratch fresh each day (Wednesday is Tomato Basil which, is my personal favorite). And the salads are yummy yummy. The portions are enormous. Literally, if you order a salad..even just a house salad it is heaping on the plate practically over flowing. I am not even doing it justice. There is always at least a 20 minute wait, but people know that and just go with it. They are in Marysville, open 6 days a week for lunch and dinner (closed from 3:00 to 4:00 each day). Closed on Sundays. I usually get take out and if you do that, make sure to call it in ahead of time. The staff is friendly and the food is a heaping plate of comfort. Try the chicken fettuchini, pesto chicken calzone or soup and salad combo (all our favorites).

2011, the year of take-out!
Happy New Year!!

Monday, December 27, 2010

Long time no blog?

No excuses this time. I just have been in a cooking funk. Just a general funk I guess. But look at me? Here it is almost 2011 and I was cooking today :) Making lefse which I have blogged about before..but still. I think one of my new years resolutions will be to A. cook more and B. keep up on this stinking blog. It's harder than you would think. You may not remember..but a couple of blogs ago I joked that I should blog about take-out. I have come to think that is a fabulous idea! So you never know..in 2011 I may do a series of take-out blogs. Especially since there is a new Indian restaurant that opened right by where I work and I am absolutely addicted to it. I will surprise you.

Until then, I give you the redux of Potato Lefse!

5 large potatoes, approx, 6 cups of riced potatoes.
1/2 cup whipped cream
Flour, 1/2 cup per cup of mashed potatoes, approx. 3 cups
3 T butter
1 tsp. salt

Boil and rice the potatoes--add cream, butter and salt;
combine, then cool (put in fridge till very cool)
Add the flour, take out dough about the size of a golf ball and roll out super thin
Bake (cook) on large griddle to light tan.
Moderate heat...do not scorch!

Ok, what is written up there is a modified version of my mother in laws lefse recipe. I rice the potatoes with a potato ricer. I use a lefse grill which gets up to 500 degrees but you definitely don't have to. I use a rolling pin which has a waffle pattern on it but again...you don't have to. Carol doesn't so you don't have to. I am the freak who wants the authentic tools for the job kind of thing. Not necessary by any means but it makes me feel secure. She has made lefse for ever just mashing potatoes, rolling them out with a regular old rolling pin and frying them in a dry skillet. And you can too. Lefse doesn't require special tools. I just like the tools.

I typically will boil and rice the potatoes a day ahead then add the flour and actually make the lefse the next day. Just me. I think the key here is to mash the potatoes very well (or rice them) and roll the dough out very thin. The thinner it is the quicker it will cook.

It's a Christmas tradition in Chris' family and I try to make it twice a year. It's cheeeeeeap, and yummy. Did I say cheap? Plus, this recipe makes a ton of it! We like to put butter and cinnamon sugar on it..roll it up and enjoy. Maybe nuke it for a few seconds to warm it up. So yummy. Uff da!

Sunday, October 31, 2010

Lasagna

Who doesn't have a favorite lasagna recipe? Here is mine. Now, I should tell you up front that I have an extremely particular way I make it (hello? OCD!!!) and for me, it just doesn't taste the same otherwise. Some of my recipes are loosey goosey in parts but this is not one of those. Over the years, it has really turned into a collaborative recipe so I need to give some credit to two ladies who contributed two separate parts of the recipe. First, my mother in law Carol who gave me a simpler sauce base with which to build on and Second, Marilyn Raefield. While dating her son in high school I tasted her spaghetti one night and heard angels sing! Thanks to her for contributing this sauces signature flavor which, I add to just about all my red sauces. Muwaaah!

My lasagna begins at least 1 day ahead by making the sauce. It must sit at least overnight, but not more than about 4 days in the frig or else it just won't work (ocd...). It must sit overnight because the flavors need to marry together for it to have the richness. There is just something magical which happens in the pot during the night...beats me. Don't argue, just do it.

Sauce:
  • 2- 28oz cans of whole tomatoes
  • 1/2 of an onion
  • 1 tsp garlic
  • 1 lb meat of your choice. I use ground turkey.
  • pinch of sugar
  • Some olive oil for frying the meat
  • 3-4 tbl of Italian seasoning ish....in my opinion you can't have too much. I use Durkee Spicy Pasta Seasoning (purchased on the Internet from the Durkee website). Key ingredient.
  • A 3 count pour of Burgundy wine. I buy the super cheap stuff and only use it for sauce. If you drink Burgundy wine...use that. Burgandy..not just any wine. Key ingredient.

Brown meat in a stockpot. While that is browning, put the tomatoes and onion in batches in a blender and blend until the tomatoes are broken up to your liking and the onion in sufficiently munched up. Chris HATES onion. I blend mine until the onion disappears. I ask you, how can you make sauce without onion? You can't. When the meat is browned add the garlic and tomato mixture. Add Italian seasoning and simmer partially covered for about an hour. Add wine and simmer for about 10 - 15 minutes more uncovered. Add sugar, cool and put in the refrigerator overnight.

The next day......you will need:

1 package of lasagna noodles (the regular boil em up kind). I don't trust the no boil kind.
Deep baking dish. Needs to have deep sides so the lasagna won't dry out while cooking.
1-2 cup package of Shredded mozzarella cheese.
Grated (not shredded!!) Parmesan cheese. About a cup or so. You want grated because it helps to soak up some of the liquid of the sauce. Nobody wants a sauce that runs all over the plate.

Ok..so here goes (from memory):

Take the sauce out of the refrigerator and heat it up slowly on the stove. You want the sauce to be hot when you assemble the lasagna.Boil the noodles in salted water for about 7-8 minutes. Key thing here...you want to cook them just undercooked. Why? Because when you add the sauce and bake it the noodles naturally absorb some of the sauce and if you cook them all the way they will be overcooked and mushy. Yuck!When the noodles are done, dump them in a strainer and run cold water over them to stop the cooking. Then, (and this may sound nuts..but it is how I do it so there you go) lay each noodle on paper towel or dish towels or something so they can dry. I am a freak about moisture in the lasagna...in case you didn't pick up on it earlier.

To assemble the lasagna:
Put enough sauce in the bottom of the pan to just coat it (you don't want the noodles to stick to the pan). Put a layer of noodles on top, more sauce, sprinkle Parmesan cheese then sprinkle mozzarella. Then another layer of noodles and do it all over until you are left with a layer of sauce and the cheeses on top. This all depends on how deep your dish is (the amount of layers).
Bake covered for 30-35 minutes in a 350 oven then uncover and bake about 10 minutes longer or until it is bubbly and the cheese is melted and starting to brown.
Now. Here is another Jannell OCD step. You must do 1 of two things now:
1. Let it rest for at least 20 minutes. Sometimes that isn't even long enough.
2. Let it cool and then refrigerate for the next day.
Reason?
Because of the whole runny lasagna thing. It's saucy and juicy. By letting it rest the theory is that the noodles will continue to absorb sauce and it will set. Reality - I have YET to have that happen to my satisfaction. I, personally, make it ahead and heat it up as leftovers another day. It is nice and set and you don't get a runny mess all over the place.
You may need to play around with the amount of sauce to cheese etc ratio because I have noticed that depending on how the sauce turns out..I either need to add more or less so it isn't dry the next day. You just have to play with it. I hate doing it too..but it's never the same twice for me. Feel free to add more cheese or less. To me, that really doesn't matter as much as the drying of the noodles and the sauce sitting overnight. It's just a good, no frills lasagna recipe but it is very frilly on comfort :)
Now, go make lasagna!

Sunday, October 3, 2010

Cross your fingers and hope for the best (a baking post)

So my son, Antonio, learned how to make chocolate chip cookies in home ec class back in 6th grade. Chris proclaimed that they were his favorite chocolate chip cookies. Thus, every time we make cookies (which, trust me, isn't that often) it has to be Antonio's recipe.

You know how in cooking....you can tweak, add, subtract and change recipies to suit your tastes? In baking I am under the impression that you can't do that as easy because of the whole science of it. I guess I was wrong. Chris wanted me to make Antonio's chocolate chip cookies only with cocoa powder and peanut butter chips. Science...math? Are you kidding? While I was audibly hemming and hawing in the kitchen he just simply gave me the ratios of dry ingredients to change. And so, Antonio's chocolate peanut butter chip cookies were born. I used my new cookie sheets and cookie scoop to ease the stress of it all and they turned out pretty good. Whew.

Recipe:

1 cup butter softened
3/4 cup granulated sugar
3/4 cup packed brown sugar
1 tsp vanilla
2 eggs
2 cups flour
1/2 cup cocoa powder
1 tsp baking soda
1/2 tsp salt
1 package peanut butter chips

Preheat oven to 375
Cream together sugar, butter and vanilla in a mixer. Add eggs and mix. In another bowl mix together dry ingredients and slowly add to the wet mixing just until everything is incorporated. Drop (or scoop) onto baking sheet and bake for 8-10 minutes. I baked them for 10. Cool and eat.

Sunday, September 19, 2010

Spicy Pork Chili

Thank you to Jessica Peterson who was kind enough to give me her recipe. I didn't change a thing.

This chili has so much flavor complexity that the taste is totally worth the whole day it takes to make. It's a stove top recipe that you can't just totally leave and let it go. There are stages to it. BUT! You will be rewarded in the end and if you are serving this to guests? They will think you are some kind of chili genius! Really the only thing you need to make sure you have is a large stock pot. This recipe makes a pretty good amount, enough for a crowd.

Spicy Pork Chili
•8 tablespoons vegetable oil
•About 3 pounds boneless pork loin, cut into large chunks(I used 1 of the Costco vacuum sealed ones)
•Kosher salt to taste
•Black pepper to taste
•1 Yellow onion, diced
•2 cloves garlic, minced
•2 red bell peppers, seeded and diced
•2 jalapeno peppers, seeded and minced
•2 tablespoons brown sugar
•2 tablespoons chili powder (add more to taste)
•2 tablespoons ground cumin (add more to taste)
•1 teaspoons cayenne pepper
•3 tablespoons cilantro, chopped
•3 (15-ounce) cans diced tomatoes, with juice
•1 tablespoon honey
•3/4 cup prepared black coffee
•¾ to 1 can beer (doesn’t matter which kind…I used Rainier)
•2 (15-ounce) cans kidney beans, drained
•1 (15-ounce) can black beans, drained
•1 (15-ounce) can great northern white beans, drained
•1 (15-ounce) can chili beans, drained
•1 cup sour cream for serving
•2 cups shredded cheddar, for serving (I used cheddar jack from Costco)


Directions
Pour 4 tablespoons of the oil into a large, heavy bottomed stockpot and place over high heat for 2 to 3 minutes. Season the pork with a dash of salt and pepper and brown it in batches, 3 to 5 minutes per batch. Set aside the browned pork. Below, is the pork prior to browning. Leave your pieces fairly large so they don't cook too fast and they are easier to pull out and shred later.

Pour the remaining oil into the pot and add the onion, garlic, bell pepper and jalapenos. Season the veggies with the brown sugar, chili powder, cumin, cayenne, salt, pepper and cilantro.

Sweat the vegetable mixture over medium heat for 10 minutes, until the onion is soft.

Add the pork back to the pot along with the tomatoes, honey, coffee and beer. Simmer on medium/low for 2 hours, until the pork falls apart. Transfer chunks of pork to a plate, shred with fork and return to pot—repeat until all pork is shredded. Add beans and let simmer another 2 to 3 hours.

Serve directly from the stove top with side bowls of sour cream, chopped green onion, and shredded cheddar.

It's as easy as pie

Don't ask me why... but for some reason I don't consider making a pie, baking. Pies are an easy and inexpensive way to bring something to a gathering that has the appearance that you have really done something special. But really, it's as easy as pie. Get it?

My friend MJ's mom will just on the spur of the moment bust out her food processor and start baking a pie. It always amazed me because I thought pie was like all other baking. 1. A big mess 2. Time consuming 3. Like canning somehow where it took the better part of the day. Not true! She made it look so easy and doable that right then and there (whenever that was) I incorporated pies into my cooking club. Therefore, they are not baking. That is what I tell myself anyway.

I have since adapted both her berry pie and apple pie over the years and today I bring you the apple. Come Thanksgiving...I will bake the berry.

Seems to me that the key to a good apple pie is apples which aren't cut too big or too small. To big and it's just uncooked hunks of apple in crust. Too small and you have an applesauce pie. Both gross. I cut my peeled and cored granny smith apples into quarters and then each quarter in 1/2. Then each of those into 4 pieces. For me, that seems to be a good size for as long as I bake my pies. I prefer using granny smith apples because of the tartness and they hold up really well during baking without mushing out. Blah.

I also like to macerate my apples in a sugar, cinnamon and corn starch mixture for about 20-30 minutes. The apples lose some juice and it makes a yummy sauce that bakes up and thickens with the pie. Nobody wants a dry pie.

Pie crust is scary isn't it? It's a whole dough thing for me. I am just afraid of dough because I don't have "the touch" that bakers say you need to feel the humidity of dough. That is why the pre-prepared dough industry is booming. People, pie dough is soooooooo easy. If I tell you it's easy, it is. Stop buying refrigerated pie dough for pete's sakes!!!

Dust off your food processor. Find all the pieces and listen up! If you have a food processor that you don't use and were thinking of donating it - Don't!! I use mine for pie crust and hummus and now it earns it's keep. Food processors are like air conditioning in houses located in Washington state.....when you need it, you need it. Am I right? The great thing about the food processor is that it will incorporate the fat into your flour quickly and therefore, you get a flakier pie crust. It's the chunks of fat in the crust that make it yummy.

Thank you Mrs. Johnson.

Apple Pie

Filling
1 cup sugar
cinnamon to taste
2 tbl cornstarch
5-6 granny smith apples cut in chunks (peeled and cored)

Crust
2 cups all purpose flour
dash of sugar
dash of salt
2/3 cup shortening
7 tablespoons ice water

Preheat oven to 400 degrees. Combine filling mixture and set aside stiring occasionally. As the apples release juice, a sauce will form. In a food processor combine all but water and pulse until it looks like oatmeal. Add water and run until a ball forms. Divide dough in two parts. Wrap in plastic wrap and chill for about 15 minutes. Roll out and assemble pie. Cut slits in top of pie for steam to escape. Brush top of pie with milk or egg wash and sprinkle with cinnamon sugar.

Bake at 400 for 20 minutes. Reduce heat to 350 and bake for 40-50 minutes longer or until crust is golden brown and you hear the juice inside bubbling. Cool on a wire rack.

Thursday, September 9, 2010

Cream of Broccoli Soup

So, in the super cool produce co-op haul I got a bunch of broccoli. The only thing I know how to do with it is steam it. Zzzzzzzzzzz. Oh wait, it's 55 degrees outside - I shall make soup!

Again a hybrid soup recipe. It was surprisingly easy. I found that some people puree theirs in a blender or mash with a potato masher. I did the blender thing and just pulsed it a couple of times so there was still texture but not big hunks of broccoli in the soup. I decided to add just a bit of cheese to the flour/milk mixture (I did it just like I do my mac and cheese) just because it seemed like it needed a little something. I was right. And I was pleased with myself that I added just enough cheese for a back note of flavor but not enough to turn it into a caloric cluster. I had a picture..but I can't find it now. This gives you a good opportunity to use your imagination. Imagine a picture of Cream of Broccoli Soup :)

Cream of Broccoli Soup
Ingredients:
1 Tb Butter
1/2 Onion - chopped
1 Stalk of celery - chopped
4 1/2 Cups of chopped up broccoli pieces
Salt and pepper to taste

Milk mixture
1 1/2 Tbl butter
1 1/2 Tbl flour
1 Cup milk
1/4 Cup shredded cheese


Melt 1Tb butter in a stock pot and saute onion and celery until tender. Add broccoli and broth, cover and simmer for 20 minutes or until broccoli is fork tender.

Put soup in a blender (in batches if you need to) and blend to the desired consistency. Pour back into the pot.

In a separate sauce pan, melt 1 1/2 Tb butter, stir in flour and add milk. Stir until thickened. Stir in cheese until melted. Add to soup. Season and serve.
YUM!

Sunday, September 5, 2010

Chicken Corn Chowder

Only in Seattle, can it be 80 degrees one day... and then 59 the next! This Labor Day weekend has been a bit gray so in honor of the weather (and my super cool produce co-op haul) I am making soup.

Chicken corn chowder is my interpretation of several recipes that I have adapted over a few years and so now I have this no-measurement version. I know, I know! But I will still give a recipe (even though the measurement may be "ish" instead of tbl)

This is great left over and really good with any kind of rolls. It's a stick-to-your-ribs kind of meal.Chicken Corn Chowder

Ingredients
2 russet potatoes, peeled and chopped into ½ in cubes
5 ears of corn – with kernels removed
1 smallish onion chopped
½ package of bacon (I like center cut..there is less fat)
2 chicken breast from your fave. Grocery store’s deli – chopped into bit size cubes
1 package sliced mushrooms
1 package (Costco) or 1 cup or so of instant mashed potatoes
4-5 cups of chicken broth
1-2 cups of milk
My seasoning “to taste” or just salt and pepper to taste

Directions:
In a large stockpot, fry bacon on med to med high heat until desired crispiness but slowly enough to render out as much fat as possible.
Meanwhile, take the corn off the cobs and set aside.
Remove bacon but leave all the fat in the pot – I know! Chop up the bacon into small pieces and set aside.
Add onions and saute until beginning to brown.
Add corn kernels to onion and saute for about 5 minutes or so. Until desired doneness. I still like mine a tad crunchy. Add some seasoning.
Dump the corn mixture into a bowl and set aside.
Add mushrooms and seasoning to the pot and saute until they are slightly browned but have lost their water.
Dump everything back into the pot including chicken, potatoes and bacon. Warm the chicken through.
Add chicken broth and simmer until potatoes are cooked 5-10 minutes.
Add milk and bring to simmer.
Slowly add instant potatoes until desired thickness. It will really depend on how much liquid you have.

Saturday, September 4, 2010

Produce Co-Op Bounty

My friend Sascha, just turned me on to the coolest program ever! It's a produce co-op called "Bountiful Baskets"!! It is so cool I can't stand it. Like some of you, I have checked out the farmers markets locally in the summer and I even went so far as to check out the local CSA programs for fresh produce. Let me say that I am all done with that...the Bountiful Baskets program is economical and convenient. You don't have to commit to the whole season either! You pay week to week. The first time there is a fee of 3.00 which pays for the basket that the volunteers use to sort your haul of food but then after that it's $15.00 per week and look at all the goodies I got for my money:
2 Heads of romaine lettuce
1 Head of cauliflower
1 Bunch of broccoli
1 Head of cabbage
1 Honeydew melon
9 Bananas
14 Plums
7 Ears of corn
4 Beefsteak tomatoes
12 Nectarines
9 Oranges

WOW!!!

What to make with all of this? Well, for starters I will be making Chicken Corn Chowder and Cream of Broccoli Soup. Yes, it is already soup weather here is Seattle. A big salad with the greens and maybe just steam the cauliflower. The fruit? I am sure the kids will take care of that for me :)

Another cool thing is that the fruit isn't quite ripe yet so it's not like we have to rush to eat it. Every thing is uber fresh and you can't beat the price. Thank you Bountiful Baskets - you will see me again next week!

Sunday, August 29, 2010

Girl's Night In

What's better than going out with your girlfriend for dinner? Staying in and cooking dinner together!

I had a quite house this last weekend so I invited my friend (Amy...the one who bakes - which will now be her Dances with Wolves name) over to cook, chat and eat. Our job was to come up with two dishes each that we could cook and both eat. I was armed with movies to have playing while we cooked and I made us mojitos - yummy. I was careful not to start drinking the mojito too soon in the cooking process and have the meal come dangerously close to looking like the "Lemon Drop" Thanksgiving where the stock accidentally went down the drain.

Helpful tip...always, always put a bowl under your colander when straining stock or you have no gravy. You would think that this is a "duh" statement. I am living proof that it is not.

Side note: I was having issues with the lighting and picture quality so trust me when I say that the food tasted better than a few of the pictures gives it credit.

Course 1:
Watermelon and feta salad.
When Amy told me the ingredients for this salad, I was all "whaaaaat"? I am now a believer. It has simple ingredients but the taste that you get is so complex. The Tabasco (I know right?) gives a little kick and balances out the sweetness of the watermelon and the tangyness of the feta out nicely. We both agreed that we could have just kept on eating it ....but we needed to save room for the other yummies.


Course 2:
Fresh Italian Tarts
All my favorite food groups: bread, tomatoes, cheese and basil. Fine, they aren't all actual food groups..but they tasted as good as they sound.


Course 3:
Stuffed Zucchini
Pick smallish zucchinis for this one. You want them firm but not too seedy. Pre bake (to soften) and fill with a mixture of potatoes, cheese, tomatoes, garlic and basil. What's not to like?


Course 4:
Fish Tacos
I love fish tacos. I have wanted to make them for at least a year or so and now seemed as good a time as any. I combined a few recipes for this one and did something I don't usually do....I winged it. *gasp* I know. I know! But it paid off this time. I think the secret to this was the Chipotle Tabasco used for the fish. It added a smokey flavor without being overpowering somehow. All I know is Amy doesn't like very many fish dishes and she ate this one - so something worked! The pictures are kind of tone-on-tone (white plate, white sauce, white cabbage) but you get the point.


Recipes:
Watermelon and Feta Salad
Ingredients:
1 Small watermelon
1 Small sweet onion julienned
Crumbled Feta

Dressing:
Juice of 1 fresh lime
1 tsp Tabasco
Black pepper to taste

Cut up the watermelon and onion. Add feta to desired amount. Mix the dressing and toss together. Dish up, eat, repeat!

Fresh Italian Tarts
Ingredients:
1 Chunk of frozen bread dough
Fresh basil
Fresh tomato
Gorgonzola or Blue cheese (we used Gorgonzola)

Thaw dough. Cut into circles with a biscuit cutter and place on an oiled cookie sheet. Cover dough with cheese, basil and 1 slice of tomato cut in half. Bake at 375 for 20-25 minutes or until dough is golden and cheese is melty. When you take them out of the oven, brush the edges of the dough with olive oil and enjoy.

Stuffed Zucchini
Ingredients: (this recipe makes 4 but I cut it down for two)
4 medium zucchini
olive oil
3 medium red potatoes or whatever you have
1 small/medium onion chopped fine
5 garlic cloves minced
3 medium tomatoes
1/3 cup julienned basil leaves
1 1/2 cups shredded Monterrey Jack cheese. I could only find white cheddar/jack so I used that.

Put one oven rack on the upper middle and one low in the oven. Put a baking sheet on each rack and heat oven to 400.
Halve each zucchini lengthwise. Scoop out seeds and most of the flesh so that the walls of the zucchini are about 1/4 inch thick. Season cut sides of zucchini with salt and pepper and brush with oil. Toss potatoes with about 1 tbl oil, salt and pepper in a bowl and spread in a single layer on the baking sheet on the upper rack and roast for about 12 minutes. Roast zucchini until slightly softened and skins are wrinkled, about 10-20 minutes depending on your zucchini. Flip zucchini over and set aside.
Heat 1 tbl oil in skillet and saute onion until soft and beginning to brown. Stir in garlic until fragrant (about 30 seconds). Add tomatoes and cooked potatoes; cook, stirring occasionally until heated through (about 3 minutes). Off heat, stir in basil, 1/2 cup of cheese and salt/pepper to taste.
Divide filling evenly among zucchini halves and sprinkle with remaining cheese. Return to oven (upper rack) and bake about 5 more minutes until cheese is spotty brown.

Fish Tacos
Ingredients:
White flaky fish (I used fresh Tilapia from Costco)
Olive oil for sauteing
Salt and Pepper to taste
Chipotle Tabasco Sauce
1-2 limes
Small tortillas
Cabbage sliced thin

Sauce:
1/2 cup plain yogurt (I used Greek)
1/2 cup mayo
Juice of 1 lime (I just bought a bag of limes from Costco)
1 jalapeno pepper minced
1 tsp capers drained and minced
1/2 tsp dried oregano
1/2 tsp cumin
1/2 tsp dill weed
1/4 - 1/2 tsp cayenne pepper

Mix all the sauce ingredients and set aside for the flavors to marry. Heat olive oil in a saute pan and saute fish turning occasionally until done. Sascha, I can't give you exact times on this step....but I think it took my fish about 15 or so minutes. I tend to over cook fish rather than under :) Salt and pepper to taste while cooking and when almost done..squeeze lime juice over fish and shake about 5 or 6 shakes of Chipotle Tabasco (or until it looks Tabascoey enough). Warm tortillas, place fish..white sauce and cabbage on and enjoy.

Mojito (for 1 drink):
1 1/2 Rum
Club soda
12 mint leaves
1/2 lime
2 Tbl simple syrup (1/2 cup sugar and 1/2 cup water. Heat until sugar is dissolved and then cool). Basically, equal parts. I use super fine sugar (left over from my Martha Stewart obsessing days)

Muddle mint in a glass. Add lime juice and the lime if you want. Add 2 tbl simple syrup. Add ice. Add rum and top with club soda. Stir.


A lip smackin good time was had by all......

Monday, August 9, 2010

Our everyday spice recipe

This spice gets it's own blog because I can never find it to give out the recipe.

Everyday spice:

1 Part Granulated Onion
1 Part Granulated Garlic
1 Part Med ground black pepper
1 ½ Parts Table Salt